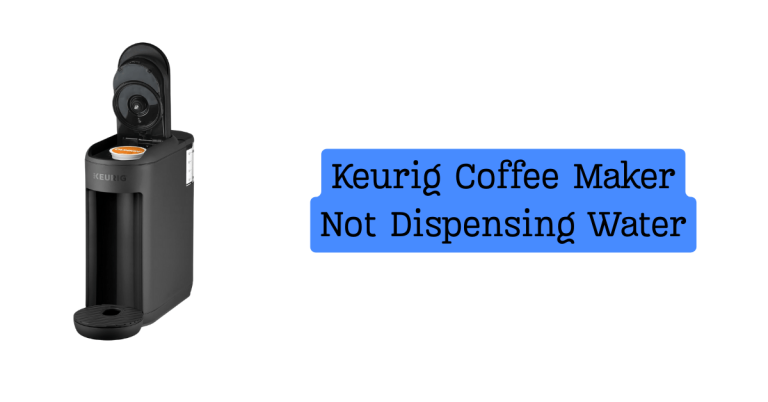
Waking up to a dry machine feels like hitting a wall before your day even starts. You just want a hot cup, but instead, you are stuck searching for keurig coffee maker how to add water while half-asleep. I know the struggle; my neighbor actually called me yesterday thinking her brewer was broken when it was just a simple tank issue. I have used and fixed these machines for years, so I can tell you it is easier than it looks. Let’s get that reservoir filled the right way so you can finally enjoy your morning brew.
Why Adding Water Correctly to a Keurig Matters
You might think water is just water. But your machine knows the difference. Treating the reservoir like a dump bucket leads to problems. I used to just pour tap water in blindly. My coffee started tasting like old pennies. It was gross.
Adding water the right way protects the pump. It keeps the internal tubes clean. This stops the dreaded Keurig add water error from blinking at you. Think of it like putting gas in a car. You need the right amount of the right fuel.
If you rush this, you hurt the machine’s lifespan. I once overfilled my tank in a hurry. The water overflowed and leaked into the base. It took days to dry out. Good habits now save you money later.
Keurig Coffee Maker – How to Add Water Step by Step
Step 1: Turn Off and Unplug the Keurig (Optional but Recommended)
Start by turning the machine off. I like to unplug it, too. It is a small safety habit. It ensures the machine doesn’t try to pump while dry.
This resets the sensors. It acts like a mini reboot for the system. A reader named Mike told me this fixed his glitchy screen. It only takes a second.
Step 2: Locate the Water Reservoir
Look for the clear plastic tank. On most big units, it sits on the left side. On smaller models, it might be in the back.
Some models have a lid right on top. These do not come off. But most standard ones have a detachable tank. Knowing which type you have is key.
Step 3: Remove the Water Reservoir (If Applicable)
If your tank comes off, lift it up. Pull it straight up by the handle or sides. Do not yank it sideways. It should slide out smoothly.
My aunt cracked her tank by pulling it forward. The plastic tabs are fragile. Treat it like a glass of milk. Gentle is always better.
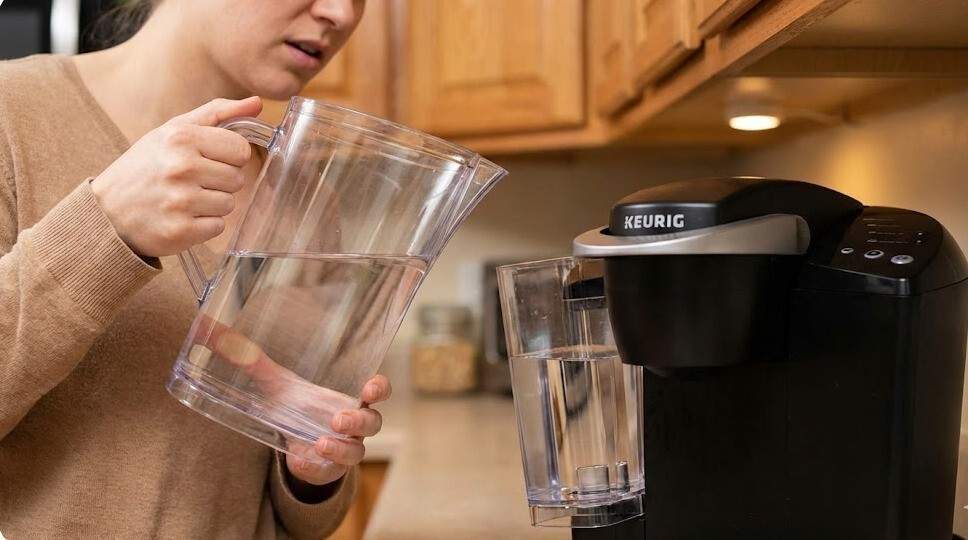
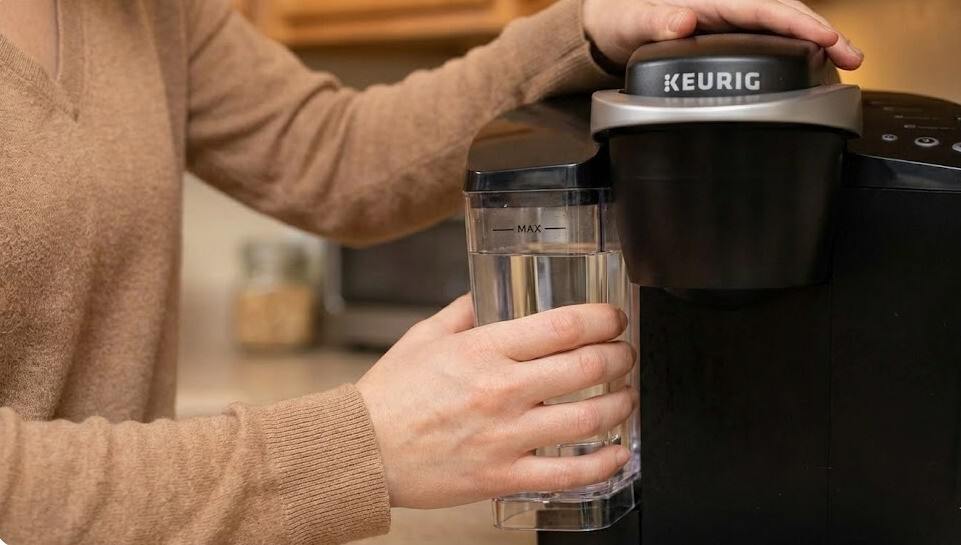
Step 4: Fill the Reservoir With Fresh Water
Take the tank to your sink. Fill it with cold, fresh water. Filtered water is the best water for Keurig coffee maker units. It prevents scale buildup inside.
Look for the “MAX” fill line. Stop right before you hit it. Do not overfill it. I learned this the hard way. Too much water creates a vacuum lock.
Step 5: Reattach the Reservoir Securely
Bring the tank back to the base. Align the tabs at the bottom. Slide it down until you feel a firm click. That click is vital.
If it sits loose, the sensor won’t read the water. This is why a Keurig says add water but it’s full. A snug fit solves half your problems.
Step 6: Power On and Run a Test Brew
Plug the machine back in. Press the power button. Listen for the hum of the pump. It should sound smooth, not loud or raspy.
Run a brew cycle without a pod. This is just hot water. It confirms the water flows right. It also warms up the mug for your actual coffee.
Common Mistakes People Make When Adding Water to a Keurig
We all make mistakes. I ruined my first machine by treating it like a cactus—ignoring it for weeks. The biggest error is not seating the reservoir correctly. If the tank wobbles, the machine cannot pull water.
Another classic slip-up is ignoring the MAX line. Filling it to the brim seems smart, but it backfires. It creates a vacuum seal that traps water. Your machine will hum, but nothing comes out.
Avoid using hot water or straight distilled water. Hot water damages the internal tubing instantly. Distilled water is too pure; the sensors cannot “feel” it. This confuses the system and triggers false alerts.
How I Add Water to My Keurig (My Personal Routine)
I have brewed thousands of cups. Over time, I built a routine that works every time. It keeps my coffee tasting fresh and hot. Here is exactly what I do:
- I use a filtered pitcher: I fill a Brita pitcher first, then pour it into the tank.
- I rinse the tank: Before refilling, I give the tank a quick rinse in the sink.
- I check the float: I tap the side of the tank to ensure the magnetic float moves freely.
- I listen for the click: When I put the tank back, I push down until I hear it lock.
This routine takes thirty seconds. It prevents air bubbles and bad tastes. A friend tried this and said her Keurig water reservoir not filling issue vanished.
Troubleshooting: Keurig Says “Add Water” Even When It’s Full
This is the most annoying glitch. You stare at a full tank, but the light blinks. The machine thinks it is empty. Don’t panic; it is usually a sensor trick.
Check Reservoir Alignment
Lift the tank up and put it back down. Do this firmly. Sometimes the tank sits slightly crooked. This breaks the connection with the base.
Clean the Water Sensor Area
Dust or coffee grounds can block the sensor. Wipe the base where the tank sits with a damp cloth. Look for the small lens or opening. A quick wipe often clears the error.
Prime the Machine
Air bubbles can get trapped in the lines. This blocks water flow. To fix this, remove the tank and clean the valve. Shake the tank gently to dislodge bubbles.
When It Might Be a Mechanical Issue
If the Keurig says add water but it’s full after all this, check the magnet. Look inside the tank for a black disc. If it is stuck at the bottom, shake the tank to free it.
How Often Should You Add or Change Water in a Keurig?
Water goes stale faster than you think. If you brew daily, refill it as needed. But never top it off endlessly without cleaning.
I empty my tank completely every three days. Old water grows slime called biofilm. It ruins the coffee flavor. Imagine drinking water from a glass that sat out for a week.
If you go away for the weekend, dump the water when you return. Start fresh. Your taste buds will thank you.
Best Water to Use in a Keurig Coffee Maker
The best water for Keurig coffee maker models is filtered tap water. It has the right mineral balance. It conducts electricity for the sensors but lacks harsh chemicals.
Avoid using 100% distilled water. As I mentioned, the sensors struggle to detect it. This leads to constant error lights. It seems counterintuitive, but “pure” water causes glitches here.
Straight tap water is risky, too. If you have hard water, scale builds up fast. This clogs the heater. Stick to filtered water for the perfect middle ground.
FAQs – Keurig Coffee Maker How to Add Water
How do I add water to a Keurig coffee maker? Remove the lid or the reservoir itself. Fill it with fresh, filtered water up to the MAX line. Place it back on the base securely.
Can I add water without removing the reservoir? Yes, you can. Use a clean pitcher to pour water into the tank while it sits on the base. Be very careful not to spill water on the machine’s electrical parts.
Why does my Keurig still say add water? This usually means the magnetic float is stuck or the sensor is dirty. Tap the tank to free the float. Wipe the base to clean the sensor lens.
Can I use bottled or distilled water in a Keurig? Bottled spring water is fine. Avoid distilled water. It lacks the minerals the sensors need to detect water levels.
Should I empty the water reservoir every day? You do not need to empty it daily. However, do not let water sit for more than a few days. Fresh water makes better coffee.
Final Thoughts: Adding Water to a Keurig Is Easier Than It Looks
Refilling your machine shouldn’t be a headache. It is a simple habit. Once you know the tricks, how to add water to a Keurig coffee maker becomes second nature.
Start using filtered water today. Listen for that “click” when you seat the tank. These small steps stop errors before they start. Go ahead and brew that fresh cup—you earned it.