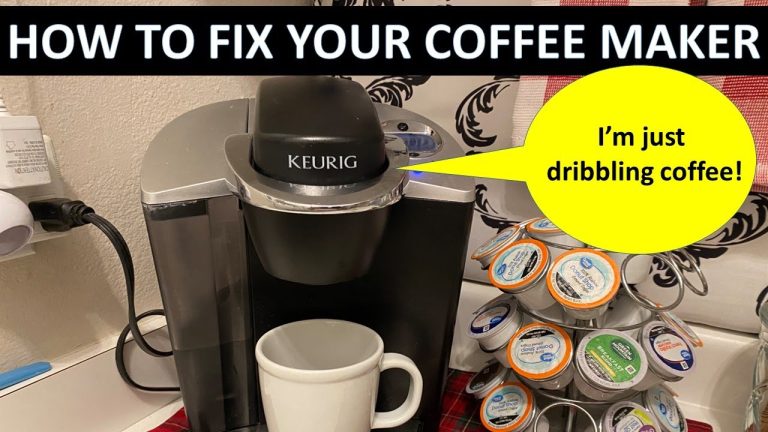

There is no sadder sound than a Keurig coffee maker not making coffee on a busy morning. It feels like your car running out of gas right when you need to leave. I have stood in your shoes, staring at a Keurig not brewing, wondering if my machine was broken for good. But after fixing my own unit, I learned the issue is often just a hidden clog or air bubble. Let me show you the simple steps that got my coffee flowing again.
Common Reasons a Keurig Coffee Maker Is Not Making Coffee
It is frustrating when you want caffeine but get silence instead. Machines are great until they stop working. I have spent hours staring at my machine, trying to guess the problem. Usually, the cause is simple and easy to miss. Here are the most common reasons your coffee stops flowing.
Clogged Needles From Coffee Grounds
Your Keurig has small needles that puncture the K-Cup. These needles are tiny and get blocked easily. It is like trying to drink a thick milkshake through a thin straw. Over time, coffee bits get stuck inside the metal tube. This blocks the water from passing through.
I first noticed this when my coffee started tasting weak. Then, I found coffee grounds stuck in Keurig cup holders. It was a clear warning sign I ignored. Eventually, the water flow stopped completely. If you see grounds in your mug, a Keurig needle clogged is likely the culprit.
Water Reservoir Issues
Sometimes, the machine is fine, but the tank is the problem. The water reservoir must sit perfectly flat. If it is slightly crooked, the machine thinks it is empty. This is a safety feature that prevents the pump from running dry.
I once spent twenty minutes troubleshooting a Keurig not pumping water. I felt silly when I realized the tank was just loose. I had rushed to refill it and didn’t click it into place. Always check the magnets at the bottom of the tank first. This simple Keurig water reservoir problem is very common.
Air Bubbles Blocking Water Flow
Water pumps struggle to move air. If an air bubble gets trapped in the line, it acts like a cork. The pump runs and makes noise, but no water moves. This often happens if you let the tank run totally dry. It can also happen after you move the machine.
I caused this by letting the water level get too low. I heard the pump humming loudly, but nothing came out. My friend Mike calls this a “vapor lock.” It tricked the machine into freezing up. The pump was working hard but pushing nothing but air.
Mineral Buildup and Scale
Tap water contains minerals like calcium. These minerals stick to the inside of your machine’s pipes. Over time, they form a hard white crust called scale. This narrows the pipes and slows down the water. Eventually, the Keurig coffee maker clogged completely.
You might notice your cup fills up slower than usual. This is the main sign you need Keurig descaling. My machine hissed and sputtered for weeks before it quit. I live in an area with hard water, so scale builds up fast. Descaling dissolves this crust and clears the path.
Power or Internal Sensor Problems
Sometimes the issue is electronic, not physical. The machine turns on, but the brew button does nothing. It feels like the lights are on, but nobody is home. Sensors inside might think the lid is open when it is shut.
I had a machine that lit up but refused to brew. I pressed every button, but it just sat there. It turned out to be a faulty lid sensor. When simple fixes fail, it might be an internal part. This is rarer than a clog, but it does happen.
Step-by-Step Fixes I Use When My Keurig Won’t Make Coffee
When my coffee maker quit, I didn’t panic. I just went through a mental checklist. You don’t need fancy tools. Most fixes take less than ten minutes. Here is the exact process that got my machine working again.
Clean the Exit and Entrance Needles
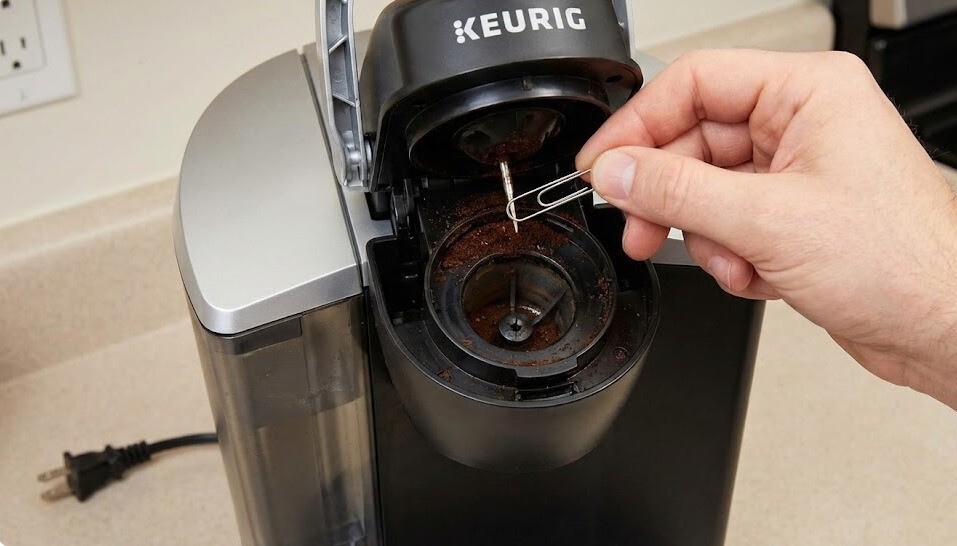
This is the most common fix. Coffee grounds get jammed in the tiny needles. I use a straightened paperclip to clear them. If you have the orange Keurig maintenance tool, that works even better.
Safety tip: Always unplug the machine first! I learned this the hard way when I poked a live machine. It wasn’t dangerous, but it started a brew cycle unexpectedly. Open the lid, insert the paperclip gently, and wiggle it to loosen the grounds.
Reset the Keurig Coffee Maker
Computers need a reboot, and sometimes your coffee maker does too. A reset can clear confused sensors. Turn the machine off and unplug it. Remove the water reservoir and let the machine sit for about five minutes.
Plug it back in and reattach the tank. Turn the power on and open the lever. Close it without a pod inside. This forces the system to reset its brewing cycle. It works surprisingly often for glitchy lights.
Descale the Machine Properly
Scale buildup chokes the water flow. You must remove it. I used white vinegar my first time because it was cheap. It worked, but my kitchen smelled like a salad for hours.
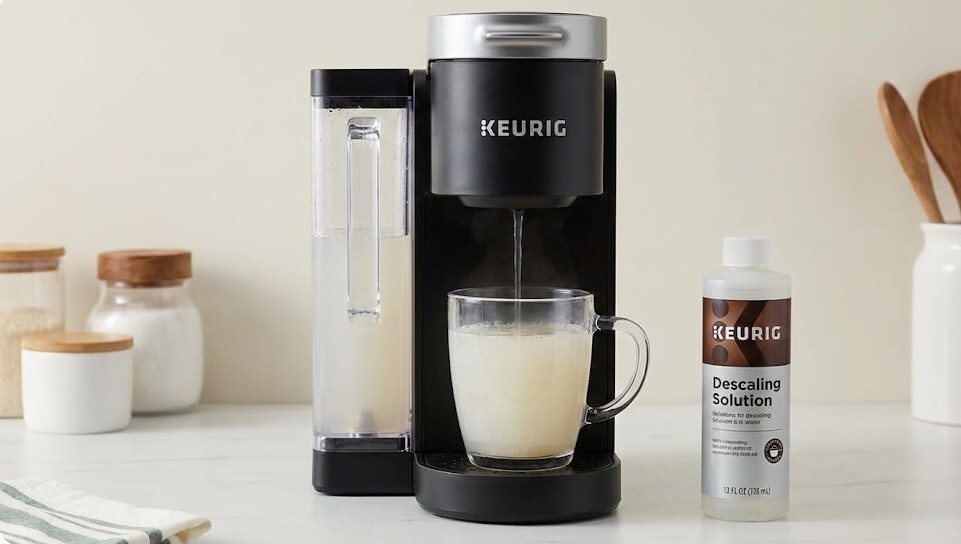
Now, I use a dedicated descaling solution. It is faster and odorless. Run the solution through the machine on the largest cup setting. Do this until the “Add Water” light turns on. Let it sit for 30 minutes, then rinse with fresh water.
Fix Water Flow and Airlock Problems
If the pump makes noise but no water comes out, it is likely an airlock. This is just an air bubble stuck in the tube. The fix feels a bit silly, but it works.
Remove the water reservoir. Fill it a quarter of the way. Give it a firm shake. Some people even gently tap the machine’s side. This motion forces the air bubble to move up and out.
When Your Keurig Turns On but Still Doesn’t Brew
There is a big difference between a dead machine and a stubborn one. If the lights come on, you still have hope. This means the power supply is fine. The issue is likely mechanical, not electrical.
If you hear the pump humming, the motor is trying to work. This usually points to a clog or an air bubble. If the lights are on but there is total silence, the internal pump might be dead.
I had to decide if a repair was worth it last year. My old unit was five years old. The pump died completely. The cost of parts was half the price of a new one. In that case, Keurig coffee maker not working meant it was time to upgrade.
How I Prevent My Keurig From Stopping Again
I hate fixing the same thing twice. Once I got my coffee flowing, I changed my habits. Prevention is easier than repair. I now stick to a strict routine to prevent Keurig clogging.
My weekly cleaning routine
I run a “cleansing brew” once a week. This is just running hot water through without a pod. It flushes out old coffee oils. I also wash the pod holder in the sink.
Descaling schedule
I do not wait for the light to blink. I descale every three months like clockwork. If you use your machine daily, minerals build up fast. Regular descaling keeps the heater efficient and the coffee hot.
Water type I now use
I stopped using tap water. My tap water is hard and full of calcium. I switched to filtered water from my fridge pitcher. It makes a huge difference in taste and reduces scale. These simple Keurig maintenance tips have saved me a lot of headaches.
Is It Time to Replace Your Keurig Coffee Maker?
Sometimes, you have to let go. Coffee makers do not last forever. The average lifespan is about three to five years. If you use it heavily, it might be less.
If you have descaled, cleaned needles, and reset it, but it still won’t brew, it might be done. Listen to the pump. A loud, grinding noise is a bad sign. If it leaks water from the bottom constantly, the internal seals are likely shot. At that point, buying new is smarter than fixing.
Frequently Asked Questions (FAQs)
Why is my Keurig coffee maker not making coffee but has water?
It is likely a clogged needle or an airlock. The pump pulls water, but a blockage stops it. Try the paperclip method on the needles first.
How do I unclog my Keurig coffee maker?
Use a paperclip to clear the entrance and exit needles. Then, run a cycle of hot water. Using a descaling solution also helps clear internal pipes.
Why does my Keurig stop mid-brew?
This is often due to scale buildup or an overheating sensor. Descale your machine to remove mineral deposits. If the problem persists, the pump may be failing.
How often should I descale my Keurig?
You should descale every three to six months. If you have hard water, do it more often. Regular maintenance prevents clogs and keeps coffee hot.
Is it safe to use vinegar in a Keurig?
Yes, white vinegar is safe and effective. Mix it 50/50 with water. However, you must rinse the machine thoroughly afterwards to remove the taste.
Conclusion: What Finally Fixed My Keurig (And What I Recommend)
Fixing a broken appliance feels like a victory. For me, the culprit was a simple clogged needle combined with some air in the line. A paperclip and a good shake saved my morning routine.
Don’t rush to throw your machine away. Most “broken” Keurigs just need a good cleaning. Try these steps first. Start with the needles, then descale. You will likely save money and get your caffeine fix back. If I can do it, you can too. Good luck!