Microwave sparking fix: unplug, remove metal, clean, replace burnt waveguide cover, repaint chips.
Microwave sparks look scary, but you can solve most cases at home. In this guide, I share the exact microwave sparking fix steps I use in real kitchens. You will learn what causes arcing, what to do right away, and which parts to inspect or replace. If you want a safe, fast microwave sparking fix that lasts, you are in the right place.

Source: reddit.com
What causes sparks in a microwave?
Sparks, also called arcing, happen when electricity jumps in the cavity. It needs a path. Common paths are metal edges, burnt food, and broken paint.
Typical causes include:
- Metal in the oven. Foil, twist ties, takeout handles, or gold trim on plates.
- Food splatter on the waveguide cover. It can burn and carbonize.
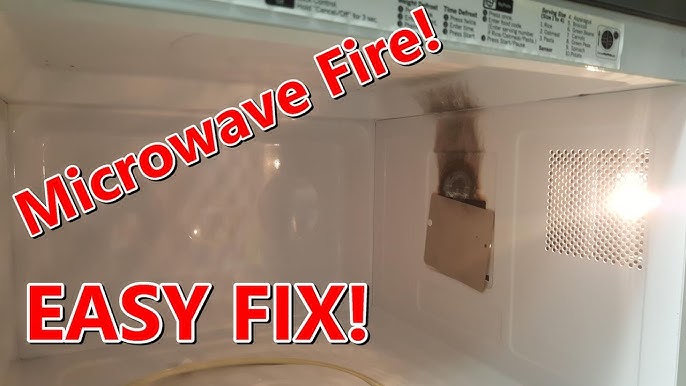
- A damaged waveguide (mica) cover. It looks brown, bubbled, or has a hole.
- Chipped interior paint that exposes metal.
- A loose rack or sharp metal edge.
- A burnt stirrer cover at the ceiling on some models.
When I get a service call, nine times out of ten the fix is simple. Clean up, remove metal, and replace a dirty or burnt cover. That is the core of a safe microwave sparking fix.

Source: youtube.com
Safety first: what to do the moment it sparks
Stay calm. Most sparks stop when you stop the cycle. Act fast, but keep it safe.
Do this right away:
- Hit Stop or open the door to cut power to the magnetron.
- Unplug the microwave from the wall.
- Remove any metal, foil, or twist tie.
- Let the unit cool before you touch anything inside.
Do not remove the outer case. The high-voltage capacitor can hold a charge. Internal parts like the diode and magnetron are not DIY. A safe microwave sparking fix never opens the cabinet.
Source: themamasgirls.com
The microwave sparking fix checklist (quick wins)
Try these easy, low-cost steps first. They solve most cases in minutes.
- Clean the cavity. Wipe walls, ceiling, and floor until spotless.
- Clean the waveguide cover. If it is burnt or soft, replace it.
- Check the ceiling stirrer cover. Replace if warped or cracked.
- Look for chipped paint. Touch up with microwave-safe cavity paint.
- Remove the rack. Test the oven without it.
- Inspect the turntable support and roller ring. Clean off any metal bits or burnt spots.
- Test with a cup of water. Run for 30–60 seconds.
If the unit now runs with no sparks, your microwave sparking fix worked.

Source: youtube.com
Step-by-step microwave sparking fix for common parts
I have fixed many “scary” sparks with a cloth and a $10 part. Here is the same process I use.
Clean burnt splatter
- Unplug the unit.
- Wipe the cavity with warm water and a little dish soap.
- Focus on brown or black spots. These can arc like tiny coals.
- Dry well. Moisture can pool and sizzle.
Replace a burnt waveguide (mica) cover
- The waveguide cover is the small rectangle panel on the side wall.
- If it is dark, bubbled, or has a hole, replace it.
- Remove the small screw or tabs, then pull it off.
- Install the new cover. Trim only if the part is made for trimming.
- Do not touch anything behind the opening. That is the waveguide channel.
Fix a damaged stirrer cover (ceiling)
- Some models have a plastic cover at the top.
- If it is brown or cracked, replace it.
- Clean the ceiling around it before you install the new one.
Touch up chipped interior paint
- Exposed metal can arc.
- Sand the chip lightly. Clean and dry.
- Apply microwave cavity paint in thin coats.
- Let it cure per the label. Do not rush this step.
Remove or replace problem cookware
- No foil, metal trim, or gold paint on plates.
- No twist ties or takeout box handles.
- Use glass, ceramic, or microwave-safe plastic.
Check the rack and supports
- Remove the rack and test again.
- If sparks stop, the rack or supports may be worn or misfitted.
- Replace rack supports if plastic is burnt or the metal is exposed.
When not to DIY
- Do not open the outer shell.
- If you suspect issues with the magnetron, diode, or capacitor, call a pro.
- If sparks continue after these steps, stop using the unit.
These steps cover the most common microwave sparking fix paths for home users.

Source: wikihow.com
When repair is not DIY: cost, parts, and pro help
There is a smart line between DIY and pro work. Knowing it saves time and money.
Likely DIY parts and costs
- Waveguide (mica) cover: about $5–$15
- Stirrer cover: about $10–$40
- Cavity touch-up paint: about $10–$20
- Turntable support or roller ring: about $8–$25
Likely pro repairs and costs
- Service call and diagnosis: about $80–$150
- Magnetron replacement: about $150–$350 total
- High-voltage diode or capacitor: about $120–$250 total
Replace vs repair
- If your microwave is older than 7–10 years and needs high-voltage work, replacement may be cheaper.
- Countertop units can cost less than a major repair.
- Built-in or over-the-range models may be worth a pro microwave sparking fix if the unit is newer.
This section helps you choose a wise microwave sparking fix plan for your budget.
Source: youtube.com
Prevent sparks: best habits and care
A few simple habits stop sparks before they start.
Daily habits
- Cover your food to reduce splatter.
- Wipe the cavity after messy heats.
- Use only microwave-safe containers.
Weekly checks
- Inspect the waveguide cover for stains or burn marks.
- Look for chips in the paint and touch up early.
- Clean the turntable, support, and roller ring.
Usage tips
- Avoid super small loads with long times. Add a cup of water if needed.
- Keep racks steady or remove them if not needed.
- Never run empty.
These habits lock in your microwave sparking fix and keep the oven safe.

Source: d3appliance.com
Tools, parts, and where to buy safely
You do not need a full tool kit. A few basics do the job.
Helpful tools
- Phillips screwdriver for covers and racks
- Soft cloths and a non-scratch scrub pad
- Mild dish soap and warm water
- Fine sandpaper for paint prep
- Nitrile gloves and safety glasses
Parts and sourcing
- Get OEM or high-quality aftermarket parts.
- Match the model number from the label on the door frame.
- Buy waveguide covers and stirrer covers made for your model.
- Use only microwave-rated cavity paint.
With the right parts on hand, a microwave sparking fix is fast and low stress.

Source: youtube.com
Frequently Asked Questions of microwave sparking fix
Why is my microwave sparking with nothing inside?
Hidden splatter or a damaged waveguide cover can still cause arcing. Clean the cavity and inspect the cover for burn marks or holes.
Is it safe to use a microwave after it sparked?
Stop and inspect before using it again. If sparks were due to metal or splatter and you fix it, it is usually safe, but test with water first.
Can chipped paint cause sparks in a microwave?
Yes. Exposed metal can arc. Use microwave-safe cavity paint to cover chips after cleaning and drying the area.
How do I know if the waveguide cover is bad?
It will look dark, greasy, bubbled, soft, or have a hole. If you see any of these signs, replace it before using the microwave.
Can aluminum foil ever be used in a microwave?
Only if the manual says so and with strict limits. In most homes, it is safer to avoid foil to prevent arcing.
Why does my microwave spark only with certain dishes?
Some dishes have metal trim or metallic paint. Use plain glass, ceramic, or microwave-safe plastic instead.
Do I need a professional for a repeated spark problem?
If cleaning, replacing the waveguide cover, and touching up paint do not fix it, call a pro. High-voltage parts are not DIY.
Conclusion
Most sparks come from simple causes and have simple fixes. Clean the cavity, replace a burnt waveguide cover, remove metal, and touch up paint. If sparks continue, stop and call a pro to avoid high-voltage risk.
Take 10 minutes today to do the quick checks in this guide. A careful microwave sparking fix can save your meal and your microwave. Want more simple home repair guides? Subscribe, share your result, or drop a question in the comments.